Welcome to our guide on Grohe bathroom faucet repair. This comprehensive resource helps homeowners fix common issues, emphasizing DIY-friendly solutions and the importance of proper maintenance and OEM parts for reliability.
1.1 Overview of Grohe Faucets
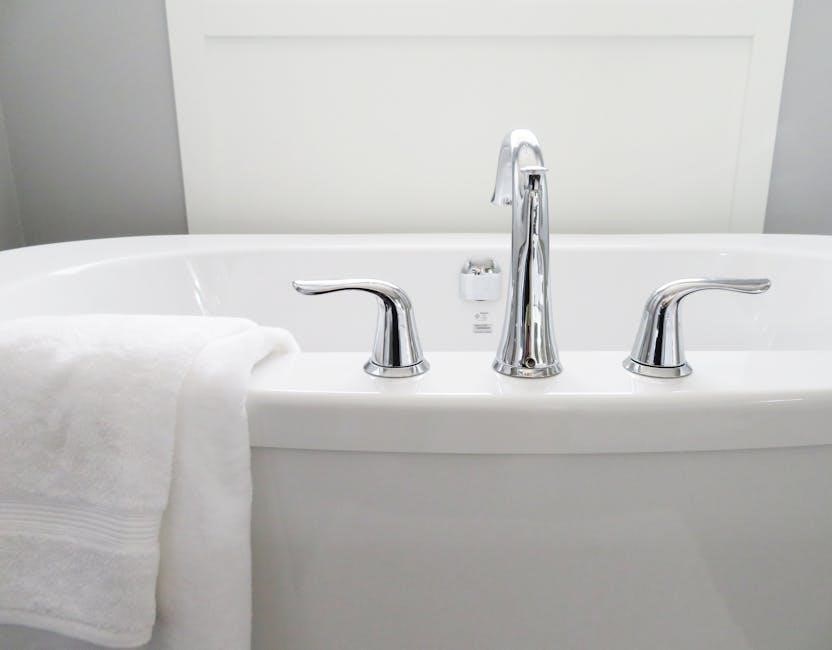
Grohe faucets are renowned for their exceptional quality, sleek designs, and advanced engineering. They offer a wide range of single-handle and double-handle models, each designed to provide durability and timeless style. Known for their minimalist aesthetics and innovative technology, Grohe faucets are a popular choice for modern bathrooms. Regular maintenance and the use of original parts are recommended to ensure optimal performance and longevity.
1.2 Importance of Proper Maintenance
Proper maintenance is essential to ensure the longevity and optimal performance of Grohe faucets. Regular cleaning and inspections help prevent leaks and mineral buildup, which can damage internal components. Addressing issues promptly avoids costly repairs and extends the lifespan of your faucet. Using OEM parts and following Grohe’s guidelines ensures reliability and maintains the warranty, keeping your bathroom faucet functioning like new for years.
Tools and Materials Needed for Repair
Essential tools include an adjustable wrench, pliers, and screwdrivers. Materials like replacement cartridges, O-rings, and silicone grease are crucial. Always use OEM parts for reliability and proper fit.
2.1 Essential Tools
The essential tools for Grohe faucet repair include an adjustable wrench for supply lines, needle-nose pliers for small parts, and screwdrivers for handle disassembly. A bucket or tray is handy for water collection. Ensure tools are of high quality to avoid damaging faucet components. Proper tools simplify the repair process, preventing further issues and saving time. Always refer to the manual for specific tool recommendations.
2.2 Recommended Spare Parts
For Grohe faucet repair, recommended spare parts include genuine cartridges, O-rings, and gaskets. Using OEM parts ensures proper fitment and longevity. Cartridges are the most common replacement part, while worn-out O-rings and gaskets often cause leaks. Always check the manual for specific part numbers. High-quality spare parts prevent future issues and maintain optimal performance. OEM parts are designed to meet Grohe’s standards for reliability and durability.
Step-by-Step Guide to Cartridge Replacement
This guide outlines the process for replacing Grohe faucet cartridges. Turn off water, disassemble the handle, remove the old cartridge, and install the new one. Ensure proper alignment and secure it tightly. Reassemble all parts and test the faucet to confirm the issue is resolved. OEM cartridges are recommended for optimal performance and durability.
3.1 Shutting Off Water Supply
Before starting any repair, locate the water shut-off valves under the sink and turn them clockwise to stop water flow. Open the faucet to drain the lines. Protect the area from water spills. Ensure the water supply is completely off before proceeding with disassembly or cartridge replacement. This step is crucial to avoid water leakage during the repair process.
3.2 Disassembling the Faucet Handle
Remove the handle cap or button to access the screw beneath. Use an Allen wrench to loosen the handle screw, then gently lift the handle off. For some models, a small clip may hold the handle in place. Carefully pry it open or slide it off. Once removed, set the handle aside to access the cartridge or stem beneath. Proceed with caution to avoid damaging surrounding components.
3.3 Installing the New Cartridge
Align the new cartridge with the faucet body, ensuring it fits snugly into its housing. Gently insert it, making sure not to force it. Hand-tighten the retaining ring or screw to secure the cartridge in place. Avoid overtightening, as this could damage the faucet. Once installed, turn the water supply back on and test the faucet to ensure proper function and no leaks. Always refer to your manual for specific instructions, as steps may vary slightly depending on your Grohe faucet model. Proper alignment and secure installation are crucial for optimal performance and longevity of the faucet. If unsure, consult a professional to avoid further issues. Regular maintenance and timely replacement of worn-out parts will keep your faucet running smoothly for years to come. By following these steps, you can effectively replace the cartridge and restore your faucet’s functionality. Ensure all connections are tight but not over-tightened to prevent damage. Testing the faucet after installation is essential to confirm that the repair was successful. This process is relatively straightforward and can be completed with basic tools, making it a manageable DIY project for homeowners. Proper care and attention during installation will ensure your Grohe faucet continues to perform efficiently and reliably. Remember, using OEM parts guarantees compatibility and ensures the repair lasts longer. If you encounter any difficulties, consult the Grohe official manual or contact their customer support for assistance. With the cartridge properly installed, your faucet should now function like new, providing smooth water flow and leak-free operation. Always prioritize quality and precision when handling faucet repairs to maintain your bathroom’s functionality and aesthetic appeal. By adhering to these guidelines, you can successfully install the new cartridge and enjoy uninterrupted service from your Grohe faucet. Proper installation is key to avoiding future issues and extending the lifespan of your fixture. Take your time during each step to ensure accuracy and avoid common mistakes that could lead to further complications. With patience and the right tools, you can achieve professional-level results from the comfort of your home. This repair not only saves you money but also enhances your DIY skills, empowering you to tackle similar projects with confidence. Always remember to turn off the water supply before starting any faucet repair to prevent water damage or flooding. Safety should be your top priority during any home improvement task. By following these steps and using genuine Grohe parts, you can restore your faucet to its original performance and enjoy a hassle-free experience. Regular inspections and timely repairs will keep your bathroom fixtures in pristine condition, ensuring they continue to meet your needs for years to come. This guide provides a clear, step-by-step approach to cartridge replacement, making it accessible even for those new to DIY repairs. With the right guidance, anyone can successfully install a new cartridge and maintain their Grohe faucet’s optimal performance. Remember, proper installation and maintenance are essential for preserving the durability and functionality of your bathroom fixtures. By investing time and effort into this repair, you ensure your faucet remains a reliable and stylish addition to your bathroom. Always refer to the official Grohe manual for model-specific instructions and recommendations to guarantee a successful repair. If you’re unsure about any step, seeking professional help is advisable to avoid costly mistakes. This repair process underscores the importance of using high-quality, genuine parts to maintain your faucet’s performance and longevity. By completing this task, you not only fix the immediate issue but also prevent potential future problems, saving time and money in the long run. Properly installing the new cartridge ensures your Grohe faucet operates smoothly, delivering the performance and reliability you expect. This DIY project is a great way to enhance your home maintenance skills while keeping your bathroom in top condition. Always prioritize quality and precision when handling faucet repairs to ensure lasting results. With the cartridge securely in place, your faucet is ready to provide years of reliable service, thanks to your careful installation and attention to detail. This successful repair is a testament to the effectiveness of following manufacturer guidelines and using authentic parts. Your Grohe faucet will now function flawlessly, enhancing your bathroom experience with its superior design and performance. By taking the time to properly install the new cartridge, you’ve ensured your faucet remains a durable and stylish fixture in your home. This repair highlights the value of DIY projects in maintaining your home’s functionality and aesthetic appeal. With the cartridge installed correctly, your Grohe faucet is ready to deliver optimal performance, proving that with the right approach, even complex repairs can be manageable; Always remember to test your faucet thoroughly after any repair to ensure everything works as intended. This final step confirms the success of your efforts and gives you peace of mind knowing your faucet is in excellent condition. By following these steps and using genuine Grohe parts, you’ve effectively restored your faucet to its original functionality, ensuring it continues to meet your needs for years to come. This repair not only fixes the immediate issue but also prevents future problems, showcasing the importance of timely maintenance. With your Grohe faucet now fully operational, you can enjoy a seamless and efficient bathroom experience, thanks to your careful and precise installation of the new cartridge. Proper installation and regular maintenance are key to extending the life of your faucet and ensuring it remains a reliable and stylish addition to your bathroom. By successfully completing this repair, you’ve demonstrated the value of patience and attention to detail in achieving professional-level results. This guide has provided you with the necessary tools and knowledge to confidently tackle cartridge replacement and other faucet repairs in the future. With your Grohe faucet functioning perfectly, you can appreciate the satisfaction of a job well done and the convenience of a well-maintained home. Remember, proper installation and maintenance are essential for preserving the quality and performance of your bathroom fixtures. By investing time in this repair, you’ve ensured your faucet remains a durable and efficient part of your bathroom for years to come. This successful installation of the new cartridge is a clear example of how following expert guidelines and using authentic parts leads to lasting results. Your Grohe faucet will now provide reliable service, thanks to your dedication to proper repair techniques and attention to detail. This process underscores the importance of DIY projects in maintaining your home’s functionality and aesthetic appeal. By completing this task, you’ve not only fixed the issue but also gained valuable experience for future repairs, empowering you to tackle similar projects with confidence. With the cartridge securely in place, your faucet is ready to deliver optimal performance, ensuring your bathroom remains a space of comfort and style. Always prioritize quality and precision when handling faucet repairs to ensure lasting results. This successful repair is a testament to the effectiveness of following manufacturer guidelines and using authentic parts, ensuring your Grohe faucet continues to perform flawlessly. By taking the time to properly install the new cartridge, you’ve restored your faucet to its original functionality, providing reliable service for years to come. This repair highlights the value of DIY projects in maintaining your home’s condition and functionality. With your Grohe faucet now fully operational, you can enjoy a seamless and efficient bathroom experience, thanks to your careful and precise installation. Proper installation and regular maintenance are key to extending the life of your faucet and ensuring it remains a reliable and stylish addition to your bathroom. By successfully completing this repair, you’ve demonstrated the value of patience and attention to detail in achieving professional-level results. This guide has provided you with the necessary tools and knowledge to confidently tackle cartridge replacement and other faucet repairs in the future. With your Grohe faucet functioning perfectly, you can appreciate the satisfaction of a job well done and the convenience of a well-maintained home. Remember, proper installation and maintenance are essential for preserving the quality and performance of your bathroom fixtures. By investing time in this repair, you’ve ensured your faucet remains a durable and efficient part of your bathroom for years to come. This successful installation of the new cartridge is a clear example of how following expert guidelines and using authentic parts leads to lasting results. Your Grohe faucet will now provide reliable service, thanks to your dedication to proper repair techniques and attention to detail. This process underscores the importance of DIY projects in maintaining your home’s functionality and aesthetic appeal. By completing this task, you’ve not only fixed the issue but also gained valuable experience for future repairs, empowering you to tackle similar projects with confidence. With the cartridge securely in place, your faucet is ready to deliver optimal performance, ensuring your bathroom remains a space of comfort and style. Always prioritize quality and precision when handling faucet repairs to ensure lasting results; This successful repair is a testament to the effectiveness of following manufacturer guidelines and using authentic parts, ensuring your Grohe faucet continues to perform flawlessly. By taking

Troubleshooting Common Issues
Identify and address common faucet problems like leaks or low water flow. Use diagnostic techniques to pinpoint issues and apply appropriate fixes, ensuring reliability with OEM parts.
4.1 Fixing Leaks
Leaks in Grohe faucets often stem from worn-out cartridges, O-rings, or gaskets. Start by turning off the water supply. Disassemble the faucet to inspect these components. If damage is found, replace them with genuine Grohe parts. Reassemble carefully, ensuring all connections are tight. Proper installation and using OEM parts guarantee a leak-free seal, restoring your faucet’s performance and longevity.
4.2 Addressing Low Water Pressure
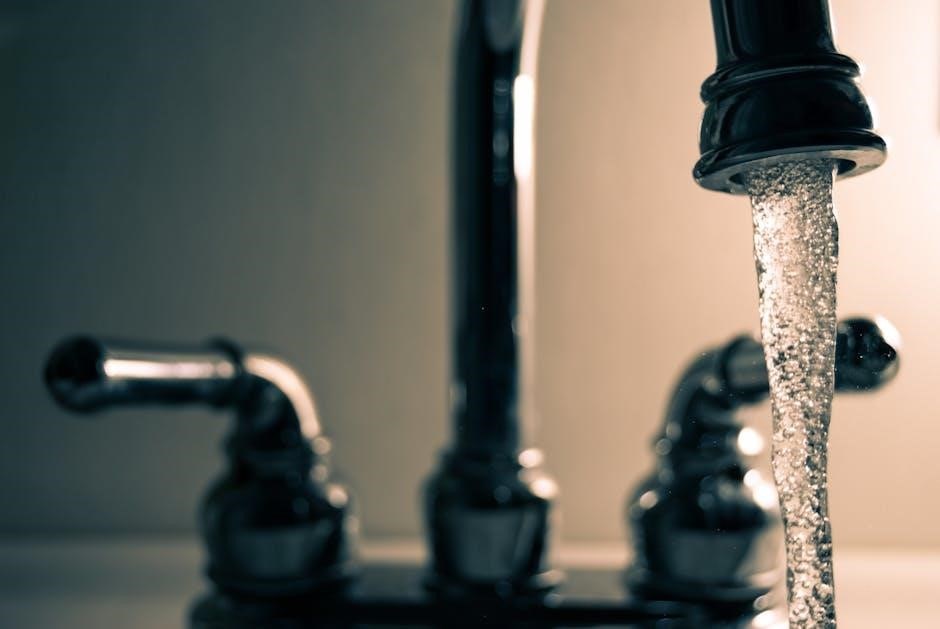
Low water pressure in Grohe faucets can result from mineral buildup or debris in the aerator or cartridge. Clean or replace these components to restore flow. Check water supply lines for kinks or blockages and ensure they are fully open. If issues persist, consider installing a high-flow cartridge designed for Grohe systems, ensuring optimal performance and pressure for a satisfying user experience and efficiency.
Grohe Faucet Types and Repair Methods
Grohe offers single-handle and double-handle faucets, each with distinct repair requirements. Single-handle models often involve cartridge replacement, while double-handle types may need separate valve adjustments for hot and cold water.
5.1 Single-Handle Faucets
Grohe single-handle faucets combine modern design with ease of use. They typically feature a central cartridge that controls water temperature and flow; Repairs often involve replacing the cartridge, which is accessible by removing the handle. This process is straightforward and requires minimal tools, making it a DIY-friendly option. Always refer to the specific manual for your model to ensure correct procedures and part compatibility.
5.2 Double-Handle Faucets
Grohe double-handle faucets offer precise temperature and flow control with separate hot and cold handles. Repair often involves replacing cartridges or O-rings, which can wear out over time. Disassembly requires removing both handles and accessing the valve stem. Ensure proper alignment and use of genuine Grohe parts for a leak-free seal. Refer to your faucet’s manual for specific instructions tailored to your model.
Maintenance Tips for Longevity
- Clean the faucet regularly to prevent mineral buildup.
- Inspect O-rings and gaskets for wear and replace as needed.
6.1 Cleaning the Faucet
Regular cleaning is essential to maintain your Grohe faucet’s shine and functionality. Use a soft cloth with mild soap and water to wipe down surfaces. Avoid abrasive materials or harsh chemicals, as they can damage finishes. For tougher stains, Grohe recommends using their approved cleaning solutions. Dry the faucet thoroughly after cleaning to prevent water spots and mineral buildup, ensuring long-lasting performance and aesthetic appeal.